
The Dispatch Edit Pane
When you add a dispatch or dispatches, you enter dispatch information into the General tab and the Material Items & Quantities tab. This general area is known as the Dispatch Edit Pane.
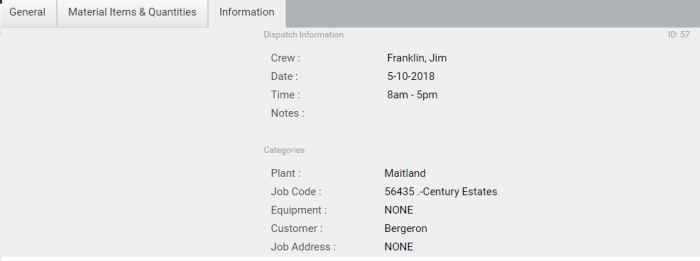
After you’ve saved the dispatch(es), you can view summary information in the Information tab.
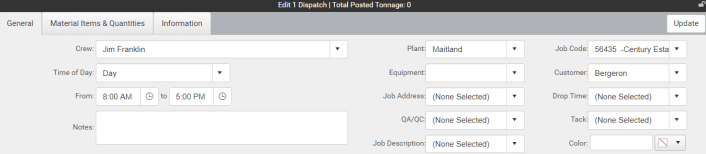
General tab
The General tab contains important information about the dispatch, including the crew, time of day, start and end time, plant, equipment used, customer name, job code, drop time, and all custom-defined categories.
The following list explains the fields for system-defined categories.
- Plant: The name of the plant that will produce the materials whether an external sale or construction. For construction, the material will be hauled to the site for the dispatch.
- Job Code: The job code and description, which is normally imported from ViewPoint. The job code determines the choices for other categories as explained above.
- Job Code Parenting: All child categories of the job code are disabled until the job code is selected. Child categories of the job code include the following: customer, phase code, mix code, and any custom categories that are configured to have job code as the parent category. Once the job code is selected, its child categories will become enabled, and will only allow selection of category items that are children items of the job code. For more information, see Understanding parent categories.
- Equipment: This is the heavy equipment that will be used at the construction site. You can choose multiple items.
- Time of Day: Choose the general time of day (EX: “Day” or “Night”). This will default the “From” and “to” times (start and end times) of the dispatch.
- Customer: The customer name for this job. Normally it is imported from ViewPoint and associated with the job code.
- Job Address: The address of the construction site.
The categories shown on this tab (except for the system-defined ones) are controlled by adding or removing categories in Admin > Categories. The category items for each category on this tab (i.e., the choices for each selector) are determined by the category items that exist in Items > [Category Name].
The order that the categories appear can also be controlled in the Categories area.
Note: If the filter equipment option is enabled, any of the Equipment category items that are being used by another dispatch at the same time do not appear. This option can only be enabled or disabled by DropTime support and is enabled by default.
Category Drop-Down Lists
Depending on how the category is configured, the drop-down list in the Dispatch Edit Pane may function differently.
If Multiple is enabled for the category, the items will appear as checkboxes allowing for multiple items to be selected for a given dispatch.
![]()
If Add on-the-fly is enabled for the category, an Add new item button will appear in the footer of the drop-down. This will let you add a new item for the category without leaving the schedule. 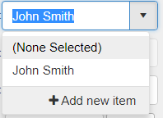
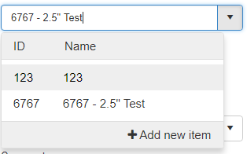
If the category is a system-defined category, the ID of the item will appear in the drop-down as the leftmost column.
Material Items & Quantities tab
The Material Items & Quantities tab in the Dispatch Edit Pane contains material data about the dispatch, including tonnage per round, tonnage per hours, phase code, mix code, tons, and total tons.
Only the phase codes and mix codes that are associated with the job code already selected show as choices in each selector. These items can be managed in Items > Phase Codes and Items > Mix Codes.
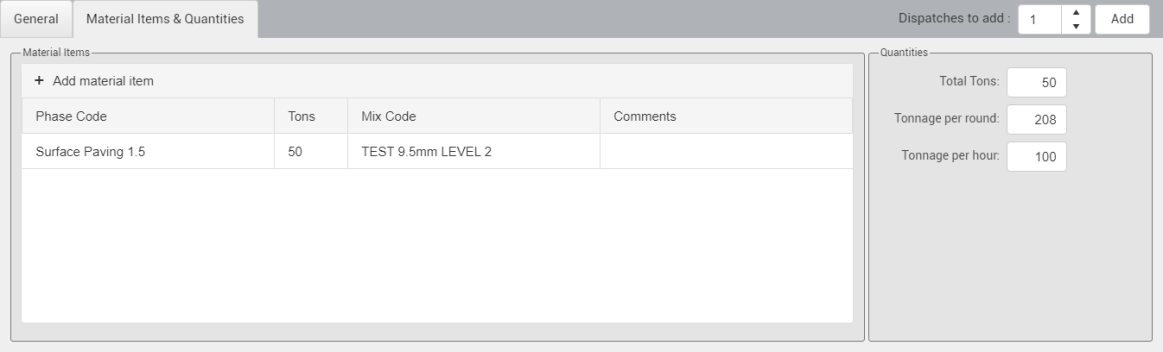
The following list explains the fields on this tab.
- Phase Code: The phase code and description for this phase of the construction. This is normally imported from ViewPoint and associated with the job code. If this is an external sale, you can use a special phase code for external sales.
- Quantity: The amount of material needed associated to the unit of measure. If applicable, the quantity is automatically populated from the Phase category item.
- Unit of Measure: The unit the quantity is measured in. If applicable, the quantity is automatically populated from the Phase category item.
- Tons: The amount of material needed in tons for the chosen phase. If Unit of Measure is set to TONS, the Tons property is disabled and will automatically populate from the Quantity text box.
- Mix Code: The mix code and description for the material used for the phase. This is normally imported from ViewPoint and associated with the job code.
- Comments: Free text comments about this phase.
- Demand On Plant: indicates whether or not the Material Item tonnage will count toward the demand on the plant (for demand forecast reports, etc.)
- Override Plant: If the plant for the material item differs from the dispatch's assigned plant, you can designate it here
There are a few optional fields that are available when the appropriate option is enabled:
- Liquid AC: You can track the Liquid AC if you have the "Use Liquid AC in Material Items" option enabled under Company Settings.
- Liquid AC Percentage: Along with the Liquid AC, you can provide a percentage from 0% to 100%.
Information tab
The Information tab In the Dispatch Edit Pane allows you to view summary information about the dispatch after you’ve saved it. It only displays if a single dispatch is selected. Read-only users will be able to see this tab.
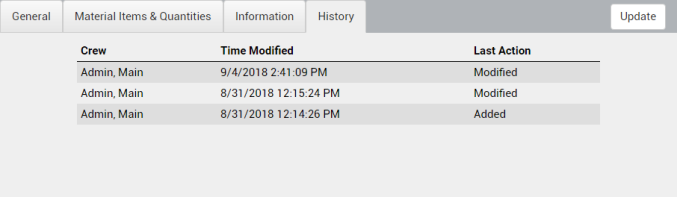
History tab
Whenever an action occurs on a dispatch, history for that action is recorded. Users can view the history of a dispatch through the History tab. This includes the user that modified the dispatch, the time that the modification occurred, and a description of the action.
Location tab
The location tab, if enabled on the account, will let you mark a geo-location for the dispatch.
A location can be chosen by either typing the address of the location or clicking on the map. Typing the location will show the address next to the "Selected Location" label, while clicking a location on the map will show the latitude and latitude coordinates. Regardless of the type of location chosen, a map and link to the location will be available in the Information tab.
Read-only users do not have access to the Location tab as it is meant for modifications to the dispatch. They will have access to the location through the Information tab.
Location tab
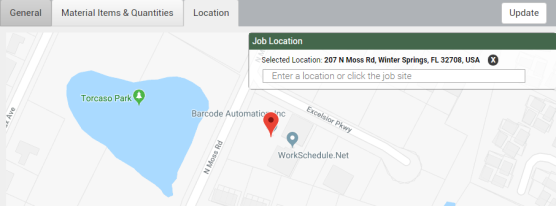
Location in the Information tab

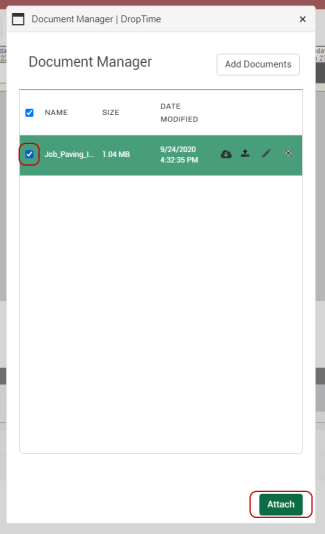
The Attachments tab, if enabled on the account, allow you to attach documents to dispatches.
Attachments tab
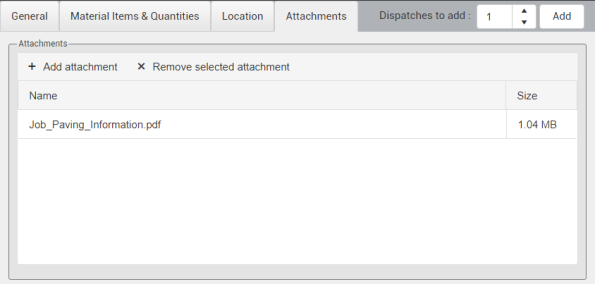
To attach a document to the dispatch, click Add attachment. On the Document Manager window, check the documents you want to attach, then click the Attach button at the bottom.
Add attachment prompt
Copyright © 2020 DropTime